Kapwing: Best Online Video Editing Tool
Before tuning into our viewpoints on Kapwing, we’d like to begin by highlighting the importance of video editing programs, especially when content creation is the utmost reality in the digital world.
If we want to conclude in one sentence, you’ll be left with a complete mess without video editing. To properly convey the message throughout the video, you have to have an impressive video editing tool like the Kapwing.
It is one of the crucial elements or tools, you can say, that is entirely responsible for enhancing raw footage, deciding the timing of information received by the audience, and the ultimate flow within the movie.
Keeping in mind such technicalities, we’ve come up with this post discussing all you need to know about the Kapwing video editing tool in one go. It’s a detailed guide consisting of the features, step-by-step guide, and best alternatives of Kapwing.
So, let’s start with its overview as follows!
Part 1: An Overview of Kapwing Video Editor
Pronounced “Ka-pwing,” like the voice of a ricocheted bullet, the company was established by two former Google Image Search staffers.
Eric Lu and Enthoven worked at Google Image Search in the lauded Associate Product Manager (APM) program that embossed various future founders for companies like Asana, Quip, and Polyvore.
However, they noticed a significant gap in the creative ecosystem right after two years. Enthoven stated that “The idea came from using outdated tools for creating the kinds of videos people desire to make for social media — snackable, short-form, videos you capture with your smartphone. It’s so hard to create those types of content in today’s editors.”
So the duo of 25-year-olds left in September to launch Kapwing. They titled it after their favorite sound effect from the Calvin & Hobbes comics when the make-believe tiger would divert toy gunshots via his best pal.
“It’s an onomatopoeia, and that’s sort of because the video is all about movement and sound.”
Part 2: [Updated] Key Specs Detailed Analysis of Kapwing Video Editing Tool
There are a lot of fascinating functions in Kapwing Video Editor that makes it a pretty useful option for anyone looking to edit their video projects online. Here are some of the most convenient features the video editor offers to its users.
So, let’s discuss them in brief without any further ado!
1 – Neatly Organized Media Library
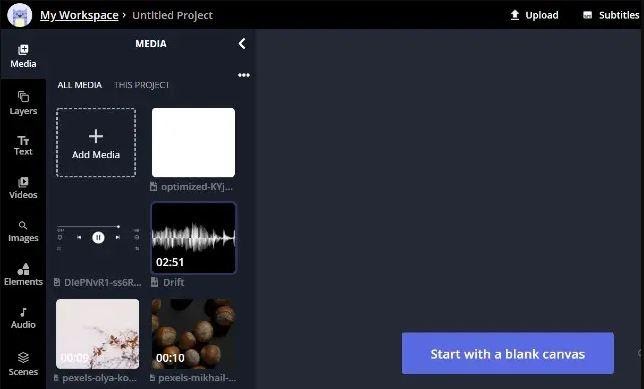
It has a neatly organized Media Library divided into two sections, the This Project and the All Media tab, as shown below.
Its drag and drop editor is quite the easiest to use, and you can switch to the All Media tab regardless of the project you’re already into!
2 – An Intuitive Timeline
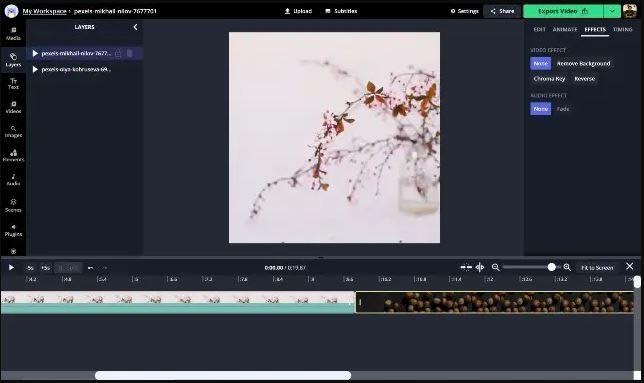
The next thing that we as an editor spend most of our time on is Timeline. You need to check how interactive it is regarding the features offered on its main panel.
And, we must say that the Kapwing video editor is the one that greatly passes this test. It has a highly interactive timeline where you can easily trim your clips, split them into different sections, and more.
Furthermore, the timeline supports layers, so you can have different clips layered on top of each other for more complex effects.
3 – Great Potential to Add Elements
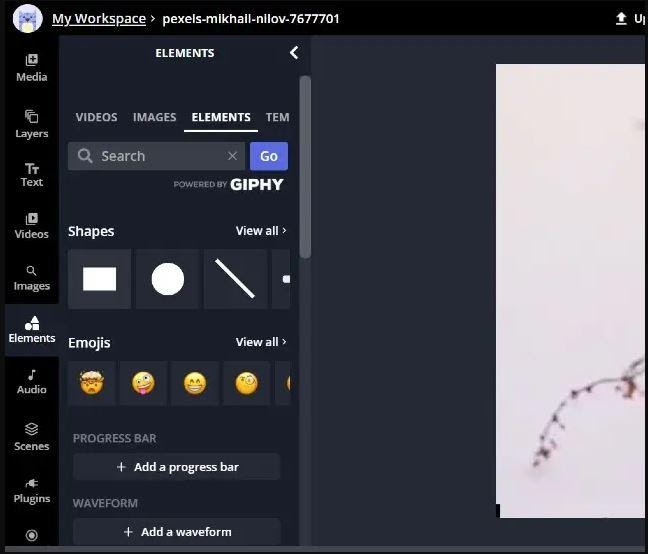
Let’s step ahead from the basic features of Kapwing and move to the most interesting ones. Whether you wish to add something simple like a text, or some emoji on top of your clip, it can be done quite simply using the elements pane.
Then, there’s a feature of animation quite easy to accomplish here, such as a progress bar. After dragging the progress bar over the video, it automatically animates according to the length of the video.
Elements also bring things like frames, waveforms, swipe-up animations, and more.
4 – Just Awesome Kapwing’s Templates!
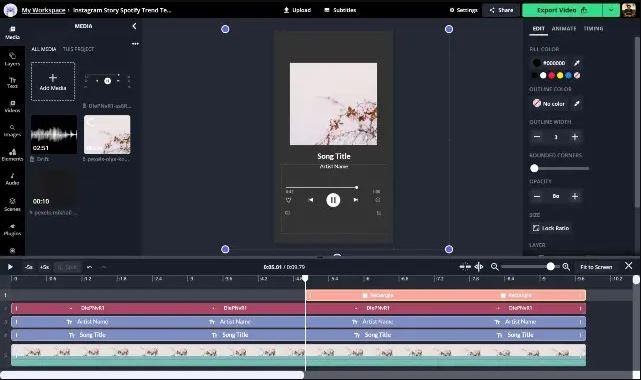
There’s no hustle involved in finding common templates within this video editor. Everything is up to the mark here! So whether you’re trying to create an appealing Instagram story, or a video post for Instagram, or even things like memes and LinkedIn posts, you will find templates for all those things.
5 – Subtitles can be Auto-Generated
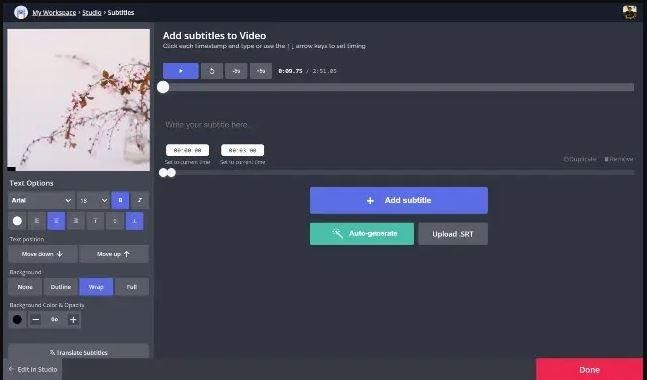
Once you are all set up in the timeline, you can simply go to the Subtitle tab within the video editor and hit the ‘Auto-Generate’ tab. What’s more, if you wish, you can even convert these subtitles to different languages.
And, if you’re looking for more control, you can manually upload an SRT file to add that as the subtitle file, or you can even manually write the subtitles directly within video editor.
Part 3: Step-by-Step Guide to Using Kapwing Studio
The Kapwing Studio is a fundamental feature that assists you to use nearly all of Kapwing’s editing tools in one place.
Step 1: Log in to Kapwing.com
After that select Get Started to log in. Now, choose New Project > Start with Studio tab to proceed.
Step 2: Upload Media
Tap the purple button that says “Click to Upload” tab and find it in your file browser. Or, you can simply drop the media into the Kapwing Studio.
Step 3: Start Editing with Different Features as Defined Below
Now, you’ve entered the main editing panel of the Kapwing Video Editor. It’s time to explore its editing features one by one as follows:
1 – Add Scene
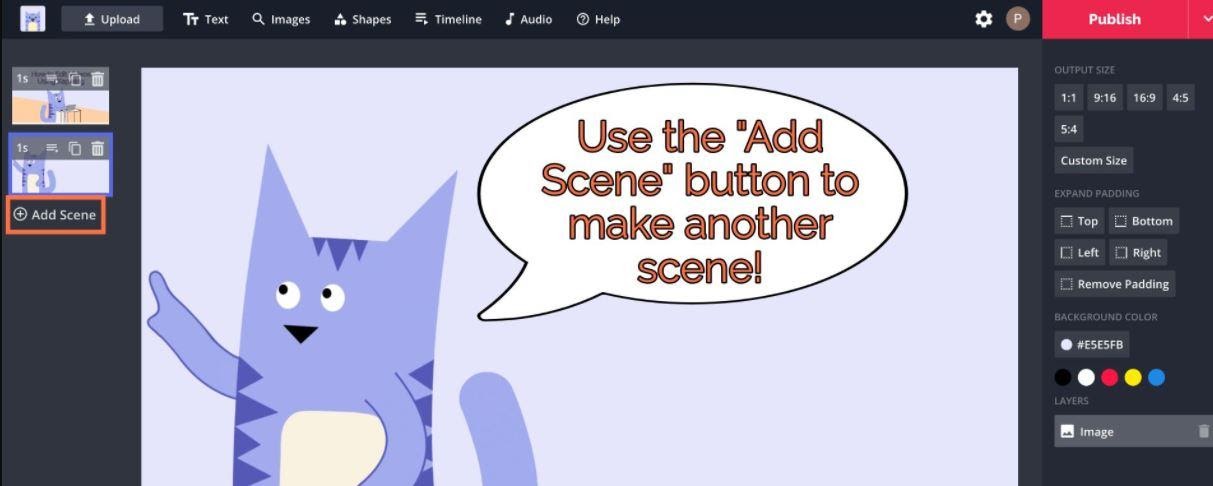
Click the Add Scene tab to add another video, GIF, or picture.
2 – Add/Remove/Edit Audio
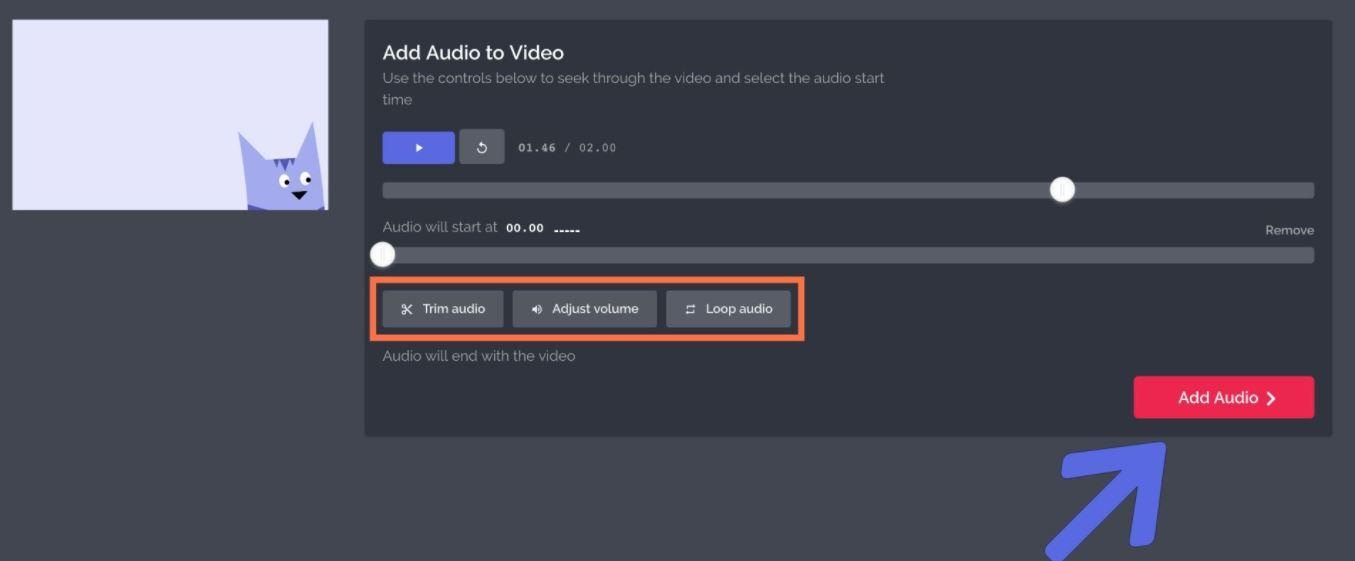
Make sure the video is selected and hit the Mute tab from the right toolbar to mute the audio. Also, you can add audio by clicking Audio from the top toolbar.
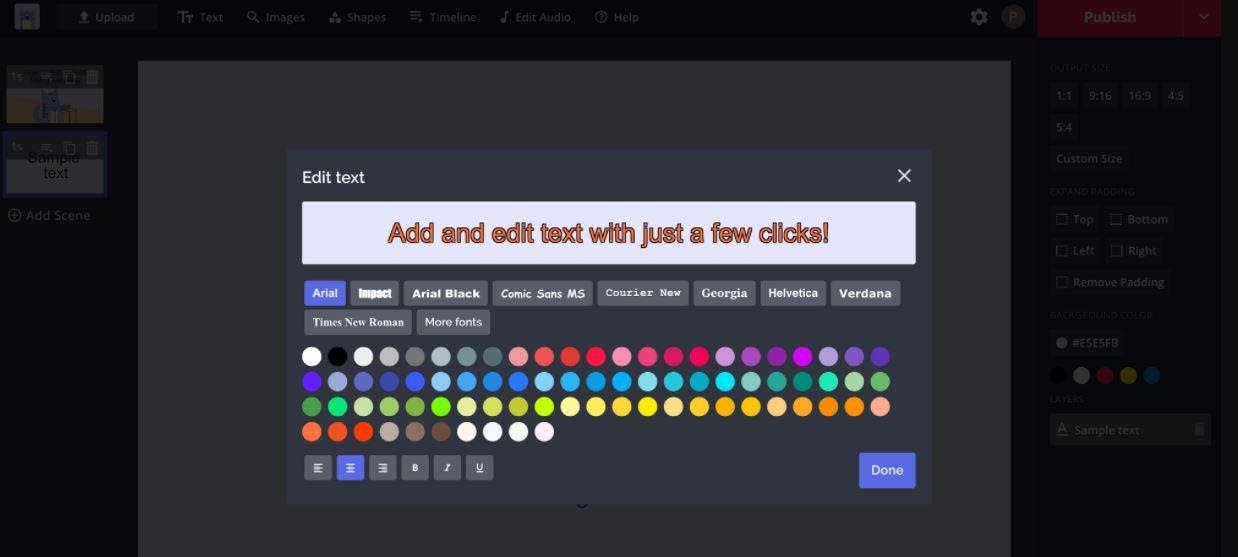
3 – Add & Edit Text
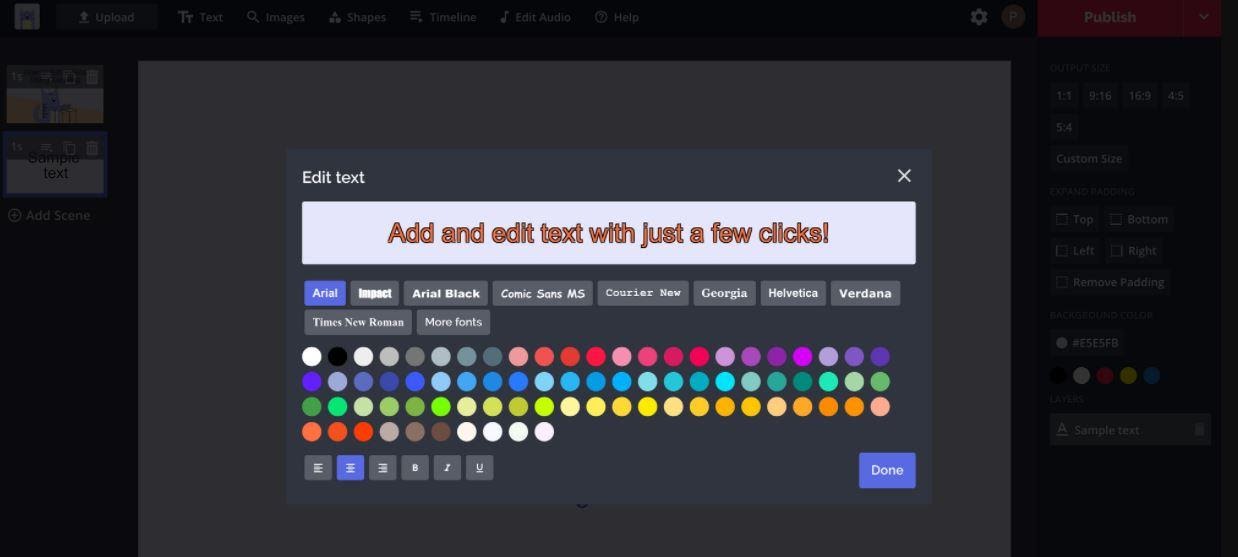
Click the Text tab from the toolbar given at the top panel and double-click it to add and edit it into your Text Box. Moreover, you can make other adjustments including the Animate tab to instantly add eye-catching animations to your text.
4 – Add & Edit Pictures
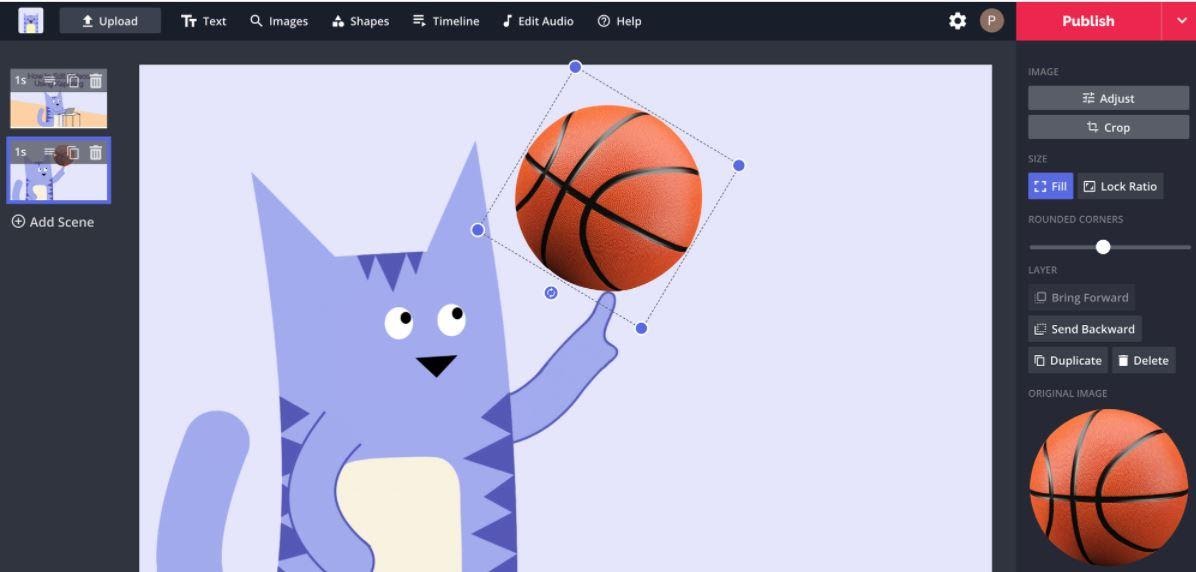
Click Images from the top toolbar and explore the adding and editing of pictures where you can resize, crop, reposition, rotate, and adjust them.
5 – Crop, Resize, and Rotate
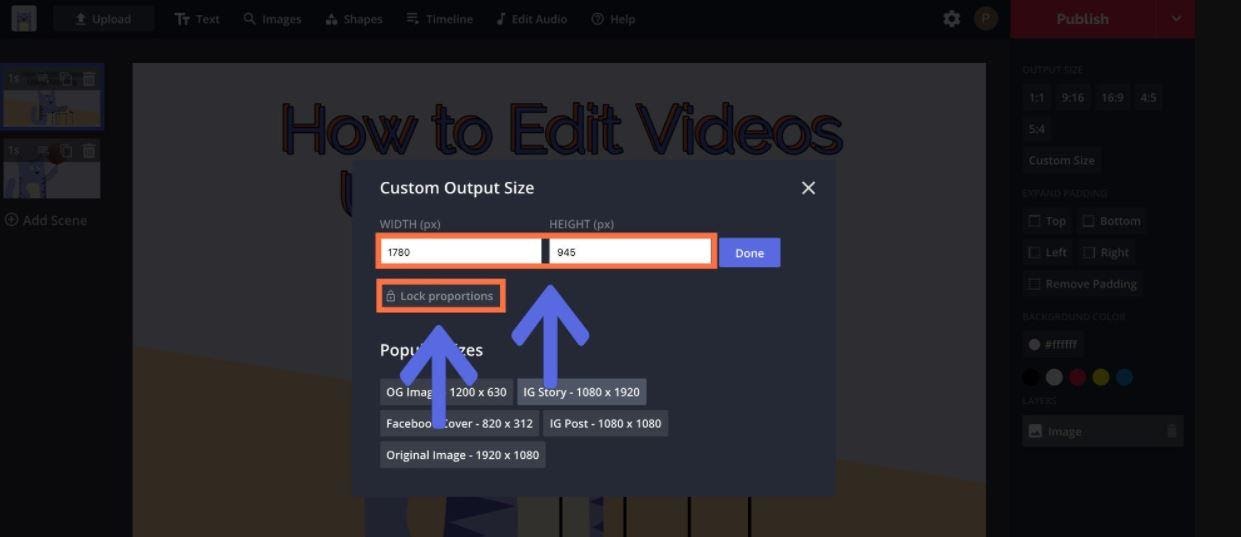
First, deselect all your layers to change the dimensions of your canvas. Now, you can choose one of the preset aspect ratios from the right panel or hit the Remove Padding tab to trim the dimensions.
You can also go for Custom Size on the right menu as shown below.
6 – Trim, Filter, and Adjust Speed
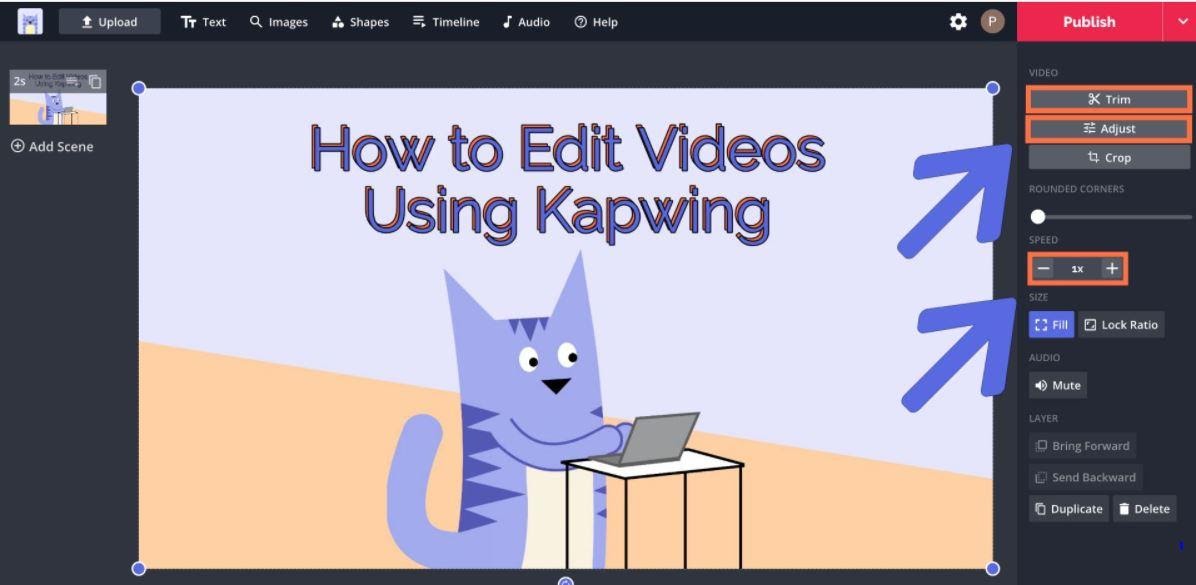
It’s super easy to trim a video in the Kapwing Studio as you’re only required to select that video and hit the Trim button on the right-hand side of the editing panel.
Then, there’s the Adjust tab to modify the opacity, brightness, contrast, blur, and saturation. Within the Speed tab, you can adjust the speed at any rate from .25x to 4x speed.
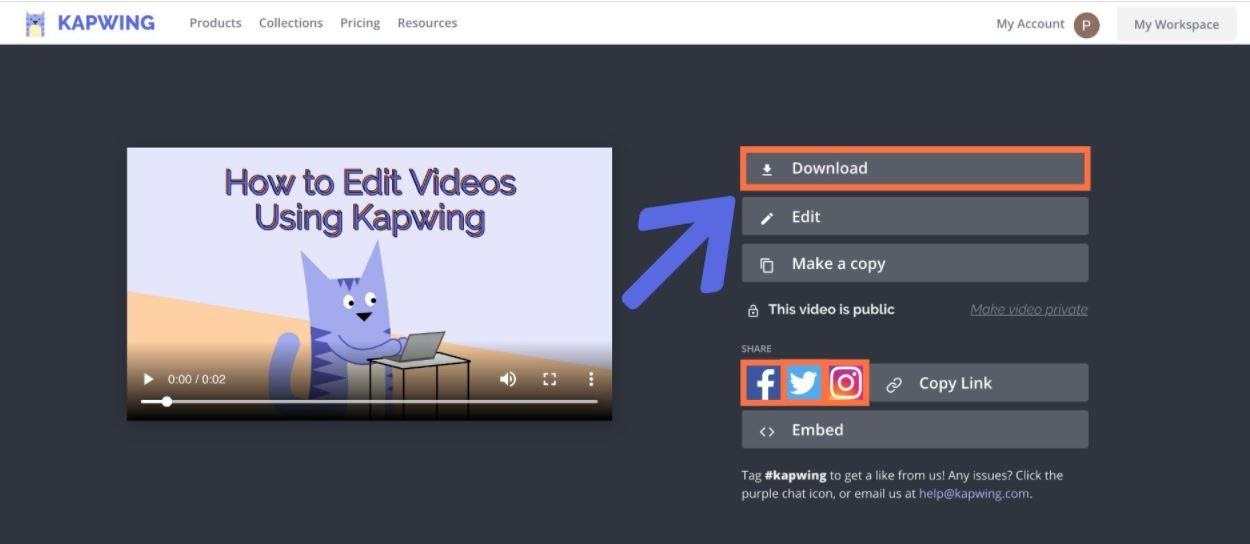
The default format to download your project in Kapwing is MP4 which can be changed to GIF in the Settings menu.
Part 4: Best 3 Alternatives of Kapwing Video Editor
After you’re done understanding the Kapwing Video Converter, we’d now like to introduce you to its 3 best alternatives.
1 – Animoto
Animoto is a video editor with a DIY architecture that can create compelling videos within minutes. The drag and drop UI removes all prerequisites of the video editing experience.
2 – WeVideo
WeVideo allows the creation of stunning professional-grade videos and offers impressive video editing solutions. This video editing program comes with screencasting capabilities.
3 – Magisto
Magisto is an AI-powered video editing software that helps users to make creative videos for their social media and marketing needs.
Conclusion
So, that’s all you need to know about the Kapwing video editing capabilities. It is an easy to use video editor which saw an immediate growth spurt as creators fueled to convert landscape videos for vertical IGTV. Its current selection of tools includes:
- Meme Maker
- Subtitles
- Multi-Video Montage Maker
- Video Collage
- Video Filters
- Image To Video Converter
- Add Overlaid Text To Video
- Add Music To Video With MP3 Uploads
- Resize Video
- Reverse Video
- Loop Video
- Trim Video
- Mute Video
- Stop Motion Maker
- Sound Effects Maker
All in all, it’s a worth considering platform especially for the creators of the 21st century!


